
The short answer
- A laptop that shows no sign of life is very rarely a dead motherboard. It is far more often the charger, the port, or one failed component on the board.
- “Won’t turn on” is five different faults. Which one you have narrows the cause before anyone opens the machine.
- Seven checks you can safely do at home resolve a good share of cases: a known-good charger, the charger’s own LED, a 30-second power drain, an external monitor, a quiet listen, stripping every USB device, and reseating RAM.
- Stop if the bottom cover is bulging or the trackpad has lifted. That is a swollen cell. Do not open it, do not charge it, do not press on it.
- Typical costs: charging port £89–£169, battery £69–£159, board-level repair £199–£449. Diagnosis is £29 and comes straight off the repair.
The sentence we hear most often on the phone is “I think the motherboard has gone.” Almost always, it has not. A laptop is a chain of small stages between the wall socket and the screen, and a break anywhere in that chain produces the same alarming nothing.
Most of the time the break is early in that chain and cheap to put right. When it is on the board, it is normally one failed component rather than the board as a whole, which is the difference between a £199 repair and a £640 quote from a shop without a microscope.
Work through this guide in order. It is written so you can get a long way without opening anything, and so you can tell a real diagnosis from a guess when you are given one.
“It won’t turn on” is five different faults
Before you touch anything, watch the machine for thirty seconds in a quiet room with the lights low. What happens in those thirty seconds narrows the fault more than anything else you can do at home.
| What you see | What it points to | What it rules out |
|---|---|---|
| Absolutely nothing. No light, no fan, no sound | The board is not receiving power, or is refusing it. Charger, cable, DC jack, input fuse, a protection circuit that has latched off, or a dead short | Almost nothing, but it makes a display or backlight fault very unlikely |
| Lights or fan, but no image at all | Power is arriving and at least the standby stage works. Memory, the display chain, the graphics output, or a firmware that never completes its start-up | A dead charger, a dead jack and most input-side faults |
| Fans spin for two to five seconds, then stop | The board begins its power sequence and aborts. One rail fails to come up, or the processor is not responding to the controller that starts it | An open circuit on the input. Power is definitely getting in |
| Powers on, then cuts out instantly | A protection trip. An over-current or over-temperature condition, a short that only appears under load, or a battery pack the board has rejected | A simple no-power fault. This is a live board making a decision |
| Backlight visibly on, screen black | The machine is running. A panel, cable, connector or graphics-output fault, not a power fault at all | Everything on the power side. Your laptop is on |
That last state catches people out constantly. Tilt the lid in a dark room and look for a faint even glow, or shine a torch at the screen at an angle and look for a ghost of the desktop. If either is there, the laptop is awake and you have a display job, priced on our published price list and explained in detail in our guide to laptop screen replacement cost by panel type.
Seven checks you can safely do, in order
Do these in sequence. Each one either fixes the machine or removes a whole class of fault, which is worth almost as much when it comes to paying for the right repair.
1. Try a known-good charger of the correct wattage
Borrow a charger you know works from an identical or compatible machine. The voltage on the label must match exactly, 19V and 20V are not interchangeable, and the wattage may be equal or higher but never lower. For USB-C, use a Power Delivery charger rated at least as high as the original.
If it wakes up: your charger has failed and the laptop is fine. If nothing changes: the fault is in the machine, the port, or the battery, and you have just ruled out the single most common cause.
2. Check the charger’s own LED, and the socket
Most bricks carry a small LED. Plug it into the wall with the laptop disconnected. No LED means test that socket with a lamp, then run your fingers along the cable at both strain reliefs, where the conductors break inside intact-looking insulation.
LED on but the laptop is dead: do not clear the charger yet. A failing brick will happily light its LED with no load and collapse the moment the laptop asks for current.
3. Do a 30-second power drain
Unplug from the mains. Remove the battery if your model has a release catch. Hold the power button down for a full thirty seconds, then reconnect mains only and try to start it. If that works, shut down and refit the battery.
This dumps residual charge and clears a latched state in the power controller, a common outcome after a power cut, a surge or a hard shutdown. On a sealed machine, skip the battery removal and just hold the button. If it starts: you are done, and nothing is broken.
4. Connect an external monitor
Plug a monitor or television into the HDMI, DisplayPort or USB-C output, select that input on the monitor, and give it thirty seconds. Press the display-switch key combination if your model has one.
An image appears: the board, the processor and the graphics are all alive. You have a screen, cable or backlight fault, which is a much smaller problem. Nothing appears: the machine is genuinely not completing start-up.
5. Listen, with the room quiet
Turn everything else off and put your ear near the vents. Press the power button and listen for a fan pulse, a faint click from a mechanical drive, a soft coil whine, or the caps-lock light flickering once.
Any sound or light at all: power is reaching the board and at least part of it is starting, which moves you from state one to state two or three in the table above. Total silence: the fault is on the input side or the board is shorted.
6. Remove every attached device
Unplug all USB devices, the dock, any external drive, the second monitor, headphones, and take the SD card out of the reader. Then try again with only the charger connected.
A shorted USB device or a bent pin in a card reader will pull a rail down and hold the board in protection so it never starts. We see it several times a month, and a £4 memory stick really can stop a £1,200 laptop.
7. Reseat the memory, if there is an access door
Only attempt this where the underside has a small screwed panel over the memory sockets. Mains out, battery out, touch a radiator or unpainted metal first. Ease the retaining clips outward, lift each module, refit it firmly until both clips snap home, and test with one module at a time in the first slot.
Oxidised or unseated memory is a classic cause of the lights-and-fan-but-no-display state. If you are not sure what your machine takes, Crucial’s memory compatibility tool will tell you whether the sockets exist at all.
Two things not to attempt
A swollen battery ends the checks immediately. The signs are a bottom cover that no longer sits flat, a trackpad that has risen or stopped clicking, a lid with a gap along one edge, or the machine rocking on a flat table. Do not open it, do not charge it, do not press on it and never puncture it. A damaged lithium pouch cell can enter thermal runaway, which is why the Office for Product Safety and Standards treats damaged cells as a fire hazard rather than a disposal problem. Bag it, keep it away from anything flammable, and get it to a bench.
Soldered memory cannot be reseated. Every Apple silicon Mac and most thin ultrabooks from 2019 onwards have the memory fixed directly to the board. There is no door and no module. If a teardown guide for your exact model on iFixit’s laptop device pages does not show sockets, stop at check six.
What an engineer does that you cannot
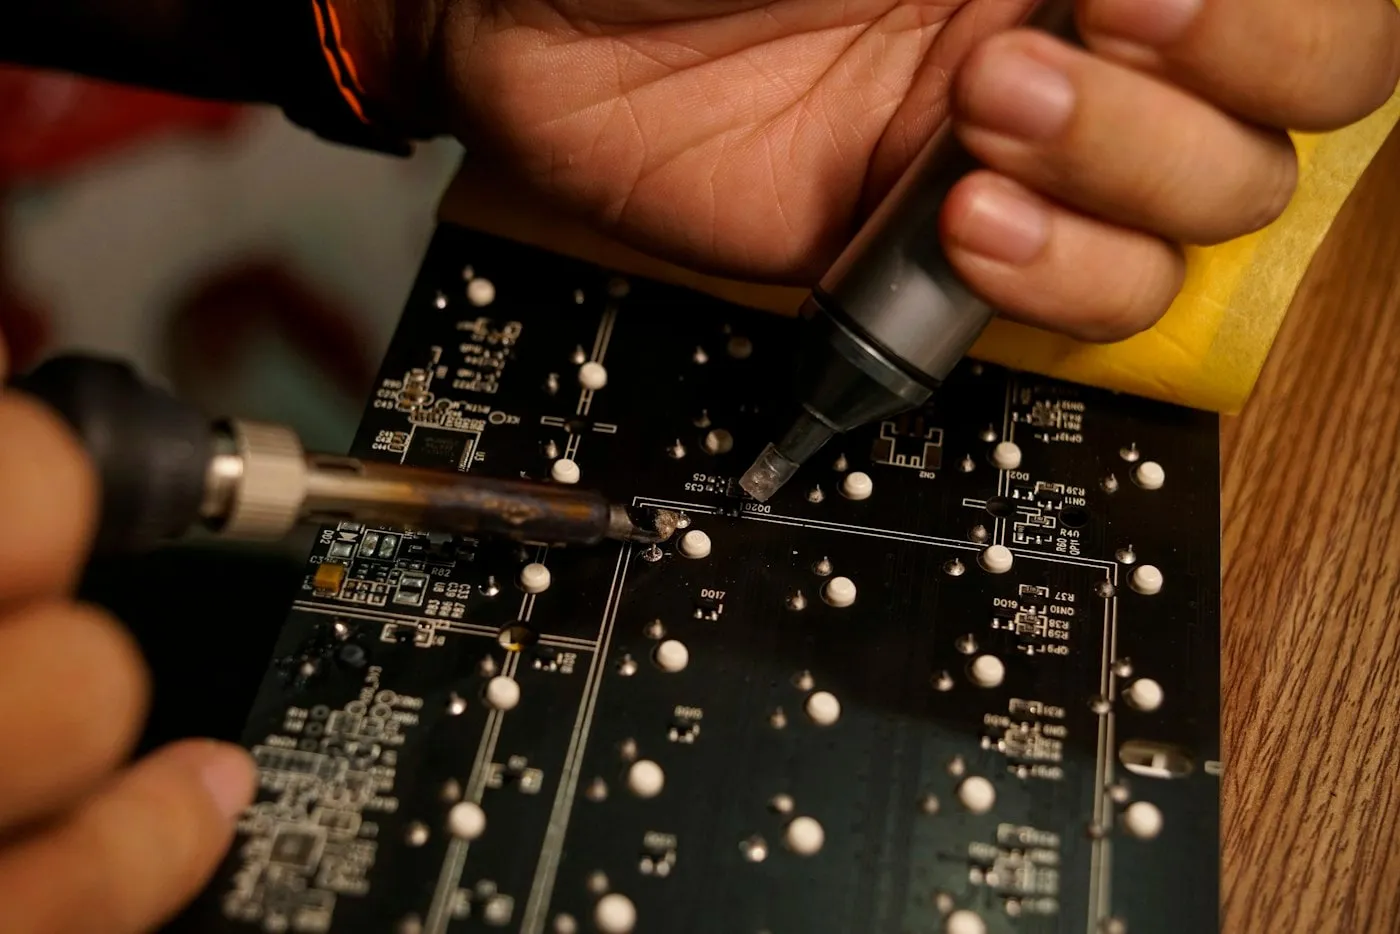
Everything above narrows the fault. Finding it means measuring, which means the board comes out of the chassis and onto the bench. This is what separates a real diagnosis from “it needs a new motherboard.”
Current draw on a bench DC supply
We feed the board directly from a variable DC supply set to its rated input voltage with a current limit, bypassing the charger, the battery and often the jack. Then we watch the ammeter. The number it settles on tells us where in the start-up sequence the board gave up.
| Reading at the input | What it means | Where we look next |
|---|---|---|
| Nothing at all, completely static | Power is not even reaching the first stage. The circuit is open before anything can switch on | Input fuse, protection MOSFETs, the DC jack or USB-C port, a fractured trace in the charging path |
| A few milliamps, steady, no change on the button | Standby power is present but the start-up sequence never begins | The embedded controller, its 3.3V standby rail, the SPI chip holding the firmware, a missing enable signal |
| A brief rise, then back down to standby | The board attempts the sequence and aborts. One rail fails to reach its target and everything shuts back down | The regulator for whichever rail drops out, its feedback network, or a load pulling that rail low |
| Straight into the current limit, amps, no rails up | A dead short to ground. The supply is pouring current into a component that should not be conducting | A shorted ceramic capacitor, a failed MOSFET, or a chip with an internal short |
| Normal running draw, screen still black | The board is genuinely running. This was never a power fault | Panel, backlight circuit, display cable, connector or graphics output |
Rail tracing against schematics and boardview
Every board brings its rails up in a fixed order, and each has an expected voltage. With the schematic and boardview file for that exact board revision, we follow the sequence step by step: always-on rail, standby rails, the controller waking, the enable signals it asserts, then the run rails.
The first rail that is missing or wrong is the fault, and the boardview tells us precisely which component on which side of the board generates it. That is the difference between replacing a £3 part and replacing the board.
Thermal imaging and diode-mode testing
On a shorted rail we inject a low voltage at a controlled current and watch the board through a thermal camera. The component swallowing that current warms up within seconds and appears as a single bright point, even when it looks perfect under a microscope.
Diode mode on the multimeter does the same job more slowly and without power applied. Black probe to ground, red probe to the rail: a healthy rail reads a characteristic value, and a reading at or near zero means that rail is shorted to ground. Comparing against a known-good board of the same model turns a list of readings into a diagnosis, and it is how our board-level and microsoldering service finds faults other shops write off.
What it usually turns out to be
These are ordered by how often they land on our bench, not by any published statistic. The costs are the typical ranges from our price list, inclusive of parts, labour and VAT.
| Cause | How often we see it | Typical cost |
|---|---|---|
| The charger has failed, not the laptop | Very common | A correctly specified replacement adapter, below anything on the repair price list |
| Charging port or DC jack damaged or unsoldered | Common | £89 – £169 |
| Battery pack failed, or a swollen cell the board has rejected | Common | £69 – £159 |
| One failed component on the board: fuse, capacitor, MOSFET or charging IC | Common | £199 – £449 |
| A latched power state that a 30-second drain clears | Regular | Nothing beyond the £29 diagnosis, which is refunded if we cannot fix it |
| Failed or unseated memory | Regular | £59 – £169 |
| Display, backlight or cable fault, so it was never actually off | Regular | £109 – £279 |
| Liquid ingress discovered on teardown, sometimes weeks after the spill | Occasional | £149 – £399 |
Notice that the top three have nothing to do with the motherboard, and the fourth is one component on it. If your machine charges intermittently or shows a charge light but never gains percentage, read our guide to what “plugged in, not charging” usually means before booking anything, because that is a different fault with a different fix.
What not to do
A dead laptop is usually repairable when it arrives. Some of what people try in the first 24 hours is what turns a repairable board into a scrap one.
- Do not keep pressing the power button on a shorted board. Every attempt drives current through a component that is already failing. A shorted capacitor is a straightforward fix. The burned trace or cooked controller you get after fifty attempts often is not.
- Do not open a machine with a swollen cell. Prising a chassis apart around an inflated pouch cell is how a repair becomes a fire. Battery work belongs with our battery and power fault service, where cells are removed and disposed of properly.
- Do not use rice. It has never dried out a laptop. It draws no moisture from a sealed chassis, it leaves starch and dust behind, and the weeks it costs you are weeks of corrosion. Our first-hour water damage guide sets out what to do instead.
- Do not use a charger of the wrong voltage. A universal adapter set one step high, or a tip with reversed polarity, will destroy the input stage in seconds. That converts a dead charger into a board repair.
- Do not leave it plugged in overnight “to see if it comes back”. It will not, and if the board is shorted you are holding current through the fault for eight hours. If the battery is swollen, you are charging a damaged cell unattended.
When it genuinely is not worth repairing
We tell customers not to spend money most weeks. Our working rule is the 50% test: if the repair costs more than half the used value of the same machine, and it is past five years old, replacement usually wins. The full framework is in our guide on deciding honestly between repair and replacement.
Specific to no-power faults, the honest no-go cases are these. A board-level repair at £199 to £449 on a machine worth £150 used. Faults that have stacked up, so the dead board comes with a cracked screen and a swollen battery. Severe corrosion after a spill that was powered on while wet. Damage under a BGA chip where the pads have lifted, or an obscure board revision with no schematic in existence.
One exception outweighs all of that: your data. A dead board does not mean a dead drive. On most Windows laptops the SSD lifts out and reads in an enclosure for a fraction of any recovery fee, so we check that first. On Apple silicon Macs and many machines from 2018 onwards, storage is soldered to the board, and repairing the board is the only route back to the files.
When the verdict is replace, ask for the drive back and send the rest to a proper electricals recycling point rather than a bin. We will wipe and return the drive free of charge on any machine we have quoted.
Related guides
- Plugged In, Not Charging: What It Usually Means — three different faults get called “the battery has gone”, and only one of them is the battery.
- Laptop Water Damage: What to Do in the First Hour — if the machine died shortly after a spill, start here instead, because corrosion is on a clock.
- Repair or Replace? How to Decide Honestly — the 50% rule, its three exceptions, and how to value a machine you already own.
Get it looked at properly
The LaptopHaber 62-point bench diagnosis is £29, and it comes off the repair in full, so a correct answer costs you nothing if you go ahead. It covers photographed intake, a rail and current-draw test on a bench supply, storage and component health checks, and a written report that names the failed part rather than the symptom.
You then get one fixed price covering parts, labour and VAT, with photographs of what we found. If we cannot repair it, you pay nothing and the £29 is refunded, including free return postage on mail-in jobs. Book a diagnosis or start a mail-in repair, or look through the full price list first to see where your fault is likely to land.